How to insert,Update,Delete data in a Database using DataSet and show data in a GridView

If you are new to ADO.NET then I will suggest you to see my previous article
How to add DataSet and Add Database table to a DataSet


We will start from our previous article where we create a dataset and put two tables on that dataset.
1.(To find your DataSet)Solution Explorer->Click on App_Code smart tag->You will see your DataSet->Double click on Dataset so that it will show on Design window.

2.Right Click on your desired table(here Login table)->Add->Click Query->Next(Make sure Use Sql Statements is selected)->Select Insert->Next->(It's optional you can click Query Builder to see your query is working properly->Click Execute Query->Insert your value->Ok->You will see a message one row affected->Ok->Ok)->Next->Next->Finish
Insert data to a Database using DataSet


3.Add a new windows form->Add two label,two textbox and a Button->Also add a Gridview->
Your Design window should look like this
Insert Data Into database with database using c#
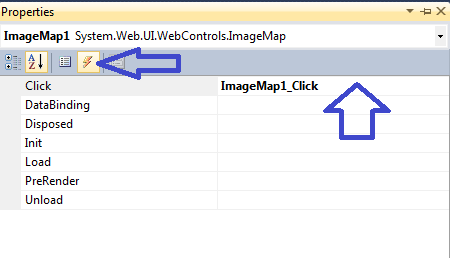
4.Click smart tag of your GridView->Select New DataSource
Asp.net GridView


Select Object->Ok->Select your Table Adapter->Finish->Checked the CheckBox Enable Sorting,Editing,Deleting,selecting(as your requirement)

5.Double click on the Button(Insert button)->And write this code


6.Click F5 to run your project

Insert Data into DataBase and Shown in a GridView


How to add DataSet and Add Database table to a DataSet

Before continue to this article I suggest you to see my previous article where i discuss about database table
How to Create a Database table in Visual Studio 2010

1.File-> New-> Website->  ASP.NET Web Site(Visual C#) -> Ok

2.Click Add New Item(shown on image)->


Select DataSet(you can change the DataSet name)->Click Add->Yes(now you will see a window)


3.Click Solution Explorer->Double Click on your  Database Name->Double click on Tables->(you will see your table list)->Drag and Drop your table to DataSet window->Click Yes(By this way add your all table one by one to DataSet window)
(Click Save Before you leave this window otherwise you will not get the DataSet)


How to Create a Database table in Visual Studio 2010

If  You are new in asp.net database related work then i suggest you first go through this article
How to Create a Database/Connect to a Database in Visual Studio 2010

1.File-> New-> Website->  ASP.NET Web Site(Visual C#) -> Ok

2.Click Solution Explorer-> Double click on Your Database->Your window should look like this.


Right Click on Tables->Click Add New Table(You will look a window like this)


*Column Name:Here you will write your attribute name
*Data Type:You will select your data type by clicking the drop down list
*Allow Nulls:If you checked the check box then you must have to put data when inserting.(primary key didn't allow nulls) .


To set primary key->Right click on User_id(black arrow beside User_id)->click Set Primary Key

Click ctrl+s(or click save to save your table)-> you will promt a window->Write your desired table name(here i write Login)->Ok

(To see your table add or not)->click solution explorer->click table(you will see your table list)
In this way you can add more Tables as you want.


If you have any problem with this article, please just leave a comment.

How to Show or Hide Panel Control Programmatically in asp.net using c#

1.File-> New-> Website->  ASP.NET Web Site(Visual C#) -> Ok

(Now You will see a Default.aspx page. To create your own page->click on dropdown list below Edit->click Add new item->Select Web Form->click Add)

2. Click ToolBox-> Double Click on Panel(or drag and drop Panel on Design view)->You can increase your Panel Width and height by clicking the sign(shown on arrow)->Right click on Panel->Select Properties->Change BorderStyle property to Solid(this is your panel border style)
Your Design Window should look like this


ToolBox->Double click on Button->Right click on Button->select properties->Change Text properties to "Show Panel" (Place your Buttons Outside Panel)

ToolBox->Double click on Button->Right click on Button->select properties->Change Text properties to "Hide Panel"

3. Double Click on Button1(Show Panel Button)->Write this code
4.Double Click on Button2(Hide Panel Button)->Write this code
5.Click F5 to run your project->OK


Panel Control is Hidden now

Panel Control is Shown When the Show Panel Button Clicked


How to Add a DropDownList to a PlaceHolder Control in asp.net Programmatically using C#

1.File-> New-> Website->  ASP.NET Web Site(Visual C#) -> Ok

(Now You will see a Default.aspx page. To create your own page->click on dropdown list below Edit->click Add new item->Select Web Form->click Add)

2. Click ToolBox-> Double Click on PlaceHolder(or drag and drop PlaceHolder on Design view)->

ToolBox-> Double Click on Button->Right click on Button->Select Properties->Change Text Properties to "Add Controls to PlaceHolder"-> Your Design Window should look like this


 3.Double click on Button to get the code behind(or Right click on Button->select Properties->Click Events->Double Click on Click Events)->Now write this code
 4.Click F5 to run your project->OK 


How to Add a RadioButtonList to a PlaceHolder Control in asp.net Programmatically using C#

1.File-> New-> Website->  ASP.NET Web Site(Visual C#) -> Ok

(Now You will see a Default.aspx page. To create your own page->click on dropdown list below Edit->click Add new item->Select Web Form->click Add)

2. Click ToolBox-> Double Click on PlaceHolder(or drag and drop PlaceHolder on Design view)->

ToolBox-> Double Click on Button->Right click on Button->Select Properties->Change Text Properties to "Add Controls to PlaceHolder"-> Your Design Window should look like this


 3.Double click on Button to get the code behind(or Right click on Button->select Properties->Click Events->Double Click on Click Events)->Now write this code
4.Click F5 to run your project->OK 


How to Add a CheckBoxList to a PlaceHolder Control in asp.net Programmatically using C#

1.File-> New-> Website->  ASP.NET Web Site(Visual C#) -> Ok

(Now You will see a Default.aspx page. To create your own page->click on dropdown list below Edit->click Add new item->Select Web Form->click Add)

2. Click ToolBox-> Double Click on PlaceHolder(or drag and drop PlaceHolder on Design view)->

ToolBox-> Double Click on Button->Right click on Button->Select Properties->Change Text Properties to "Add Controls to PlaceHolder"-> Your Design Window should look like this


 3.Double click on Button to get the code behind(or Right click on Button->select Properties->Click Events->Double Click on Click Events)->Now write this code

 4.Click F5 to run your project->OK 
After Running the Project


Add a CheckBoxList to a PlaceHolder output
After Clicking The Button CheckBoxList Shown on PlaceHolder
 

How to Add a BulletedList to a PlaceHolder Control in asp.net Programmatically using C#

1.File-> New-> Website->  ASP.NET Web Site(Visual C#) -> Ok

(Now You will see a Default.aspx page. To create your own page->click on dropdown list below Edit->click Add new item->Select Web Form->click Add)

2. Click ToolBox-> Double Click on PlaceHolder(or drag and drop PlaceHolder on Design view)->

ToolBox-> Double Click on Button->Right click on Button->Select Properties->Change Text Properties to "Add Controls to PlaceHolder"-> Your Design Window should look like this
PlaceHolder Control


 3.Double click on Button to get the code behind(or Right click on Button->select Properties->Click Events->Double Click on Click Events)->Now write this code
 4.Click F5 to run your project->OK    
Add a BulletedList Control to a PlaceHolder
After Running the Project


Add a BulletedList Control to a PlaceHolder Programmatically
When Clicking the Button BulletedList are shown on PlaceHolder

How to Add a Button to a PlaceHolder Control in asp.net Programmatically using C#

1.File-> New-> Website->  ASP.NET Web Site(Visual C#) -> Ok

(Now You will see a Default.aspx page. To create your own page->click on dropdown list below Edit->click Add new item->Select Web Form->click Add)

2. Click ToolBox-> Double Click on PlaceHolder(or drag and drop PlaceHolder on Design view)->

ToolBox-> Double Click on Button->Right click on Button->Select Properties->Change Text Properties to "Add Controls to PlaceHolder"-> Your Design Window should look like this
 3.Double click on Button to get the code behind(or Right click on Button->select Properties->Click Events->Double Click on Click Events)->Now write this code

4.Click F5 to run your project->OK
After Running the project


After clicking the Button(Add controls to PlaceHolder Button)


How to Add a Calender to a PlaceHolder Control in asp.net Programmatically using C#

 PlaceHolder Control is used like a container in which we can add other controls.It has no visual output.
The Placeholder does not render any tags for itself, so it is great for grouping content without the overhead of outer HTML tags.

1.File-> New-> Website->  ASP.NET Web Site(Visual C#) -> Ok

(Now You will see a Default.aspx page. To create your own page->click on dropdown list below Edit->click Add new item->Select Web Form->click Add)

2. Click ToolBox-> Double Click on PlaceHolder(or drag and drop PlaceHolder on Design view)->

ToolBox-> Double Click on Button->Right click on Button->Select Properties->Change Text Properties to "Add Controls to PlaceHolder"-> Your Design Window should look like this


3.Double click on Button to get the code behind(or Right click on Button->select Properties->Click Events->Double Click on Click Events)->Now write this code
4.Click F5 to run your project->OK
After Running the project


After clicking the Button the calender is shown on PlaceHolder

How to create Tabbed Multiview in asp.net with c#

1.File-> New-> Website->  ASP.NET Web Site(Visual C#) -> Ok

(Now You will see a Default.aspx page. To create your own page->click on dropdown list below Edit->click Add new item->Select Web Form->click Add)

2. Click ToolBox(Navigation)-> Double Click on Menu(or drag and drop Menu on Design view)-> Right click on Menu->Select Properties->Change Orientation properties to Horizontal


Click ToolBox-> Double Click on MultiView(or drag and drop MultiView on Design view)->

ToolBox-> Double Click on View(Place view inside Multiview otherwise it will give you error)-> Add three view. Your Window should look like this
3.Click smart tag on menu(Horizontal arrow on image)->Click Edit Menu Items->You will see a pop up window


4.Click on Vertical arrow(on image) to add menu item->change the Text to your desired menu name(here i write home)->change the value to 0 (Add as many menu item as you want-> change the Text to your desired name and increase the value by 1)(this value will be used as ActiveViewIndex value)->OK


5.Right click on Menu->Select Properties->Click Events->Double click on MenuItemClick event(Vertical arrow)


And Write this Code:
6. Click F5 to run your project->OK
After Running the project(ActiveViewIndex now 0)


After clicking Menu( ActiveViewIndex now 1)


After clicking About Us(ActiveViewIndex now 2)

How to use ImageButton Control in asp.net

1.File-> New-> Website->  ASP.NET Web Site(Visual C#) -> Ok

(Now You will see a Default.aspx page. To create your own page->click on dropdown list below Edit->click Add new item->Select Web Form->click Add)


2.Solution Explorer->Right click on Project name->Click New Folder->name this folder as Images and add your desired image in this folder


3.ToolBox->Double click on ImageButton->Right click on ImageButton->select properties-> Click ImageUrl Properties->you will prompt a pop up window like this->select your desired image->ok
You will prompt a pop up window like this->select your desired image->ok
 4.Right Click on ImageButton->select Properties->click Events->double click on click Events(to get code behind)

And write this code

5.Click F5 to run your project
 

How to use ImageMap Control in asp.net using c#

1.File-> New-> Website->  ASP.NET Web Site(Visual C#) -> Ok

(Now You will see a Default.aspx page. To create your own page->click on dropdown list below Edit->click Add new item->Select Web Form->click Add)


2.Solution Explorer->Right click on Project name->Click New Folder->name this folder as Images and add your desired image in this folder
ImageMap Control
3.ToolBox->Double click on ImageMap->Right click on ImageMap->select properties-> Change HotSpotMode to "PostBack" ->
ImageMap Control Properties


4.click on ImageUrl Properties->you will prompt a pop up window like this->select your desired image->ok
asp.net image map control


5.Click HotSpots Properties->you will prompt a window->click Add(to add hotspot area you can add many hotspot)->change radius,x and y to shown your area)->also change AlternateText and PostBackValue->ok
 6.Right Click on ImageMap->select Properties->click Events->double click on click Events(to get code behind)


And write this code
 7.click F5 to run your project->ok
Respond to a user click in ImageMap control


Respond to a user click in ImageMap control